Considering the purchase of a split system for your property, but not quite sure what the installation process entails? Whether you're a homeowner gearing up for a home upgrade or a business owner taking charge of your climate control, understanding the installation of a split system HVAC unit is crucial. This comprehensive guide walks you through every step of the process, empowering you with the knowledge to oversee a seamless installation. By the end of this read, you will have a clear picture of the timeline, the costs, and the potential hiccups along the way.
Understanding the Split System
A split system is a type of air conditioning system that consists of two primary units: an outdoor unit and an indoor air handler. When properly installed, these systems deliver superior performance and energy efficiency compared to traditional window units or portable air conditioners. They are highly customizable to the specific needs of your space, offering precise climate control and air quality regulation.
Preparing for Installation
Before your split system can be installed, there are several preparatory steps that need to be taken. This includes selecting the optimal location for the indoor unit, ensuring there's access to power and the condensation drain, and taking measurements for proper placement. The outdoor unit also needs a suitable location with enough clearance for proper airflow and future maintenance. It's advisable to consult with a professional HVAC contractor during this phase to avoid future complications.
The Installation Process
Day 1: Setting the Foundation
The first day of installation typically involves setting a sturdy foundation for the outdoor unit. A small concrete pad, often referred to as an HVAC pad, is positioned and left to dry. Meanwhile, the indoor unit location is marked, and any necessary walls are prepped for the install.
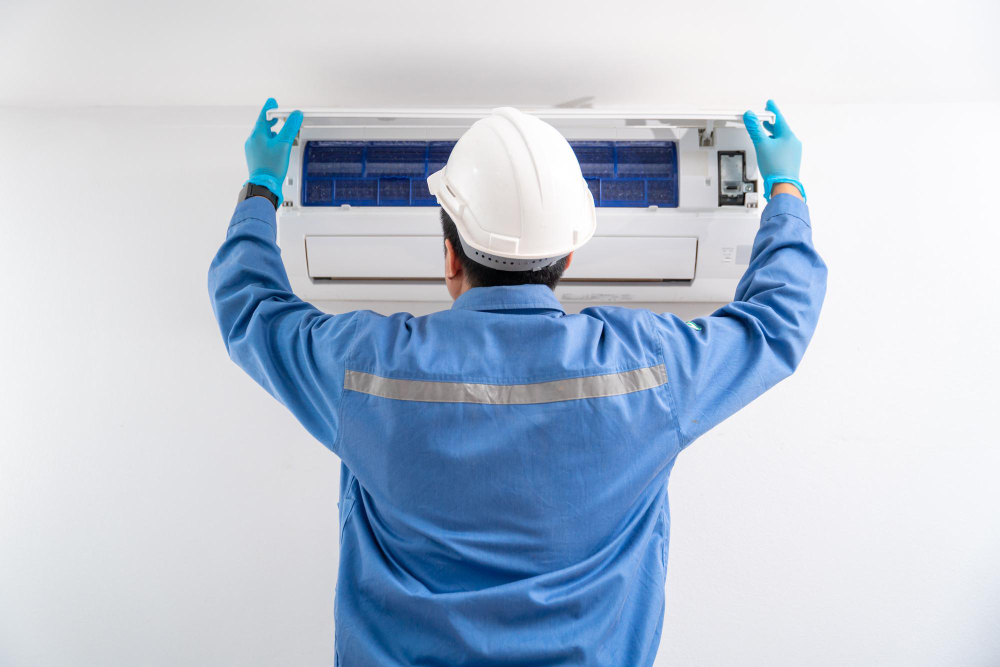
Day 2: Indoor Unit Set-Up
With the foundation in place, the second day is dedicated to the indoor unit. This involves mounting the air handler on the wall or ceiling, connecting the refrigerant lines, and preparing the drainage system.
Day 3: Connecting the Ductwork
If ductwork is required, it's installed on the third day. This involves connecting the air handler to various supply and return air ducts throughout your property. The quality of your ductwork will significantly impact the efficiency of your split system, so it's critical that it's installed with precision.
Day 4: Wiring and Insulation
The fourth day focuses on wiring the system. A professional electrician will ensure the outdoor and indoor units are properly connected to the power supply. Additionally, any necessary insulation will be added to the refrigerant lines to maintain the desired temperature.
Day 5 and Beyond: Finalizing the System
The final days of installation involve testing the system, adding refrigerant as needed, and fine-tuning the settings for maximum efficiency. Your installation team will also walk you through the operation of your new split system, including how to use any smart thermostats or controls.
Post-Installation Considerations
Regular Maintenance
To keep your split system running at peak performance, regular maintenance is essential. This includes changing the filters, cleaning the coils, and scheduling annual check-ups with an HVAC professional.
Understanding Energy Consumption
A split system can significantly reduce your energy bills, but understanding the factors that impact energy consumption is key. Proper insulation, sealing any duct leaks, and using your split system in an energy-efficient manner can all contribute to lower costs.
Troubleshooting
If you encounter any issues with your split system, knowing the common troubleshooting steps can help you address them quickly. From strange noises to inadequate cooling, a little know-how can often save you time and money on repairs.
The Cost of Installation
Installing a split system can range from a few thousand to several thousand dollars, depending on the size of the unit, your location, and any additional work that may be required. It's important to get multiple quotes and ensure the contractor is licensed and reputable.
Choosing the Right Contractor
The key to a successful split system installation lies in choosing the right contractor. Look for someone with experience in split system installations, check their references, and verify their credentials. A good contractor will conduct a thorough on-site evaluation before providing you with a comprehensive quote and timeline for the installation.
Ensuring a Smooth Installation
To ensure a smooth installation, clear the work area of any obstacles, secure any necessary permits, and communicate with your installation team throughout the process. If you have any special requests or concerns, address them before work begins.
Conclusion
The decision to install a split system is an investment in your property's comfort and value. By understanding the installation process and taking the necessary steps to prepare, you can enjoy the benefits of a reliable and efficient climate control system. Remember to do your research, work closely with your installation team, and keep up with regular maintenance to protect your investment for years to come. If you're looking for HVAC supplies in Central Florida, reach out to Discount Air Supply for all your heating and cooling needs. Your perfect indoor climate is just around the corner.